What Are the Top Evaporative Cooling Maintenance Tips?
September 19, 2025 8:14 pmEvaporative cooling systems can deliver exceptional comfort at a fraction of the energy draw of mechanical refrigeration, if they’re maintained with discipline. The following evaporative cooling maintenance tips present a practical, technically grounded checklist to maximize uptime, extend component life, and keep performance high through the most demanding parts of the cooling season. We’ll break the program into what you should do seasonally, daily, and annually, and then dive deeper into the three highest-impact subsystems: pads, water distribution/pump, and water quality/conductivity control.
Seasonal Evaporative Cooling Maintenance Tips
A seasonal maintenance window, typically late spring before startup and late fall before layup, is the ideal time to reset the system to “factory-fresh.” The goal is to start the season with clean wetted surfaces, reliable water delivery, and verified mechanical integrity, then end the season with a dry, corrosion-inhibited interior.
Pre-Season (Commissioning) Checklist
- Lockout/Tagout (LOTO) and Safety
- De-energize fan motor(s), pump(s), and control circuits.
- Don PPE: eye protection, cut-resistant gloves, and non-slip footwear.
- Verify confined space protocols if access is restricted.
- Cabinet and Structure
- Inspect stainless steel housing panels for dents, seam integrity, and fastener torque.
- Check for any gasket or weatherstrip degradation at access doors and service hatches.
- Verify that drift eliminators (if equipped) are intact and seated to minimize droplet carryover.
- Media Condition and Fit (See detailed H3 section below)
- Remove panels to inspect rigid evaporative media.
- Check for mineral bridging, brittleness, delamination, or channel blockage.
- Confirm correct orientation (airflow and water-flow arrows) and uniform compression in frames.
- Sump, Basin, and Drainage
- Clean and flush the basin to remove sludge, biofilm, and mineral fines.
- Confirm that slope-to-drain is unobstructed and that the standpipe/overflow functions.
- Inspect and exercise the drain valve; replace PTFE tape and gaskets as needed.
- Verify low-point drains and bleed-off lines are clear.
- Pump, Intake Strainer, and Piping
- Disassemble and clean pump intake strainers; replace if mesh is stretched or torn.
- Spin the pump by hand to confirm free rotation; check mechanical seal for signs of leakage.
- Pressure test distribution lines and manifolds; replace cracked PVC/CPVC or perished hose.
- Water Distribution System
- Remove and flush spray headers, branch tubes, and orifices.
- Confirm even flow from each orifice; ream or replace any that dribble or atomize.
- Level the distribution pan(s) so water spreads evenly across the media top edge.
- Float/Make-Up Water Assembly
- Calibrate the float valve so operating level sits within manufacturer spec (often mid-sight glass).
- Verify backflow prevention (AVB/RPZ) is installed and tested per local code.
- Inspect make-up line for water hammer and secure it to prevent vibration fatigue.
- Fan, Drive Train, and Motor
- Check belt tension and pulley alignment (use a laser or straightedge; max misalignment < 0.5°).
- Measure belt deflection according to belt width/span and retention after 30 minutes of run-in.
- Grease bearings per manufacturer specs (don’t over-grease).
- Megger test motor windings (record baseline insulation resistance).
- Verify VFD parameters (if equipped) for ramp times, min/max Hz, and motor FLA limits.
- Controls and Instrumentation
- Test pump interlocks, low-water cutouts, and high-water alarms.
- Verify basin level sensors, conductivity sensor calibration, and bleed-off solenoid operation.
- Confirm thermostat/PLC logic: fan-only mode, pump pre-wet timing, purge cycles, and fault handling.
- Sanitation and Scale Inhibitors
- Apply a compatible, non-oxidizing biocide or UV treatment if required by water risk profile.
- Dose descaler or polyphosphate inhibitors as recommended by your water treatment plan.
- Avoid chlorine shocks on stainless steel without explicit guidance; oxidizers can attack passive films.
Post-Season (Layup/Winterization) Checklist
- Drain and dry the sump; run the pump briefly with make-up off to evacuate lines.
- Remove and store media in a dry, rodent-proof area if the manufacturer recommends seasonal removal.
- Open all valves and unions to prevent trapped water from freezing in temperate climates.
- Wipe down stainless surfaces and consider a passivation rinse if local chemistry is aggressive.
- Lock the disconnect in the off position and label the unit “winterized.”
Daily Checks in Evaporative Cooling Maintenance Tips
Daily rounds during the peak cooling season catch degradations before they create downtime. Most issues start as small asymmetries, slightly low basin level, a single clogged orifice, or a belt beginning to glaze, then cascade into poor pad wetting and surging basin chemistry.
Daily Operating Checklist
- Visual and Auditory Survey
- Listen for new bearing noise, belt squeal, or pump cavitation.
- Verify that the entire pad surface is uniformly glossy/wet within a few minutes of pump start.
- Look for drift or mist exiting the discharge, a sign of over-saturation or missing eliminators.
- Basin Level and Makeup Rate
- Confirm water level is stable during steady-state; float should not “hunt.”
- Abnormally high makeup can indicate excessive bleed-off or a leak; abnormally low can signal valve failure.
- Conductivity/TDS and Bleed-Off (See detailed H3 section below)
- Check controller readout against a handheld meter periodically for drift.
- Ensure solenoid bleed valve cycles regularly to maintain target cycles of concentration (CoC).
- Temperature and Performance
- Record outside dry bulb (DB) and wet bulb (WB) and compare to supply air DB.
- Expected supply DB ≈ outside WB + media approach (usually 2–8°F depending on media and face velocity).
- A rising approach indicates fouled media or inadequate wetting.
- Fan Drive
- Confirm motor amperage is within nameplate FLA at current VFD frequency.
- Inspect belts/pulleys through sight ports; note dusting or frayed edges.
- Check discharge static pressure if instrumentation is installed; deviations suggest damper or filter issues.
- Leaks and Housekeeping
- Scan under the unit and along lines for drips.
- Remove debris from intake louvers; keep a clear perimeter for airflow and service.
- Control System Health
- Review alarms/history on the HMI or BMS: low water, high conductivity, pump overload trips.
- Verify time-of-day schedules, purge intervals, and any economizer damper sequences.
Annual Overhaul Steps for Evaporative Cooling Maintenance Tips
An annual deep service resets the clock on components that degrade slowly: media, bearings, belts, gaskets, and sensors. It’s also the right time to assess whether operational changes (hours, dust load, incoming water chemistry) warrant setpoint or hardware adjustments.
Annual Overhaul Checklist
- Disassemble, Clean, and Inspect
- Pull the media panels, drift eliminators, distribution pan(s), and strainers for a full washdown.
- Descale mineral deposits with an approved acid (e.g., citric) at recommended dilution; neutralize and rinse thoroughly.
- Avoid abrasive tools that can score stainless steel or erode the media’s edge geometry.
- Fan Section Rehabilitation
- Replace belts proactively (most V-belts are low cost; unplanned belt failures are not).
- Replace or regrease bearings per hours of service; use the manufacturer’s grease grade and purge procedure.
- Laser align pulleys; re-establish belt tension and record baseline vibration readings on motor and fan housings.
- Pump and Valving
- Replace pump mechanical seals or service kits as per OEM schedule.
- Rebuild or replace bleed solenoids and float valves that show seat wear or stem stiffening.
- Exercise all isolation valves; lubricate stems and replace packing.
- Sensors and Controls
- Recalibrate conductivity sensors in standard solution; replace if noisy or slow to respond.
- Validate low-water cutout, basin level sensors, and temperature probes against traceable instruments.
- Refresh controller firmware/settings backups; document setpoints and CoC targets.
- Corrosion Control and Sealing
- Inspect seams, welds, and hardware for crevice corrosion; replace with like-for-like stainless fasteners.
- Replace door gaskets, media frame seals, and any perished rubber isolators.
- If filters are installed upstream/downstream, replace and verify frame sealing to eliminate bypass.
- Documentation and KPIs
- Archive a full service report: media condition, pump head/flow, motor amps, supply DB approach to WB, controller setpoints, and any parts replaced.
- Trend these metrics year-over-year to predict pad replacement intervals and optimize bleed rates.
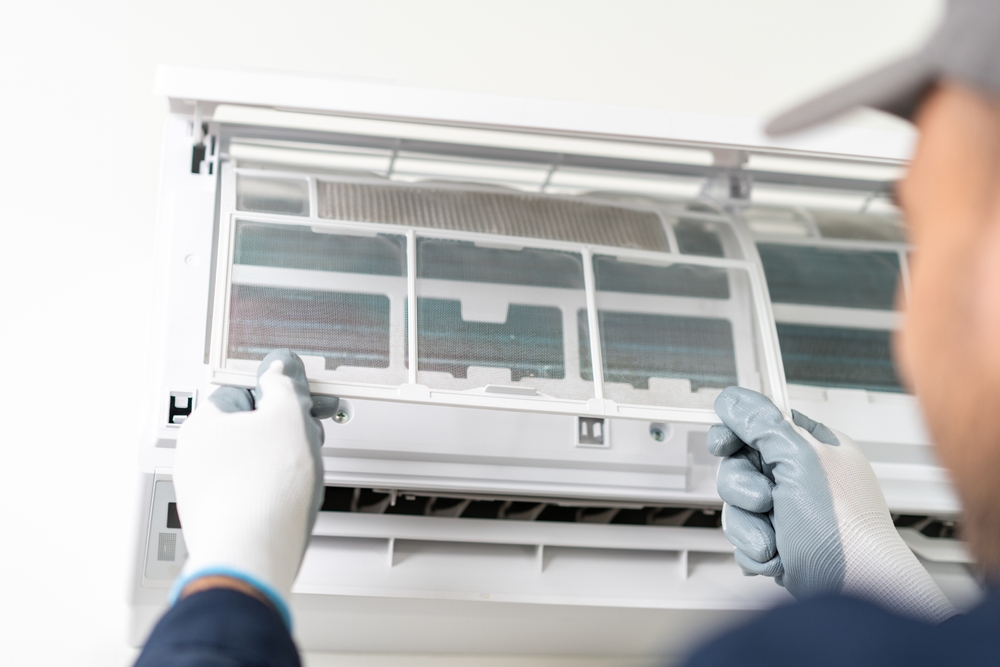
Inspecting and replacing pads in evaporative cooling maintenance tips
Evaporative media is the system’s “heat exchanger.” Its health directly sets the achievable approach to wet-bulb and the fan power needed to deliver design airflow.
What to Inspect
- Surface Integrity: Look for crusted mineral “bridges.” They reduce porosity and increase pressure drop.
- Color/Brittleness: UV and scaling can embrittle cellulose; crumbling edges or delamination signal end-of-life.
- Hydrophilicity: Water should sheet quickly across the media. Beading or channeling indicates fouling or hydrophobic contamination (oils, surfactants).
- Geometry: Confirm flute orientation (e.g., 45/15° cross-corrugation) matches airflow/waterflow arrows; incorrect orientation degrades performance.
Performance Symptoms of Bad Pads
- Rising Approach Temperature: Supply DB is consistently 6–10°F higher than typical at similar ambient WB.
- Higher Fan Amps: Fouled media increases static pressure, pushing motors toward FLA.
- Uneven Wetting: Dry streaks down the pad face suggest distribution blockage or pad shrinkage leading to gaps.
Replacement Guidelines
- Rigid media often lasts 3–5 seasons under good water quality and proper bleed; severe hardness/dust reduces this.
- Replace when mechanical integrity is compromised, pressure drop rises beyond spec, or approach temperature increases persist despite cleaning.
- Always replace in full banks where practical; mixing new and old pads can cause uneven airflow and wetting.
- After installation, verify uniform top trough coverage and no bypass around pad frame edges (use foam seals or gasketing).
Cleaning Best Practices
- Use a low-pressure rinse from the air-leaving side to push debris back out the way it came in.
- Apply manufacturer-approved descalers only; avoid household bleach on cellulose.
- Dry thoroughly before re-start if performing deep cleaning offline.
Cleaning pump and water distribution in evaporative cooling maintenance tips
Reliable, uniform water delivery across the pad is non-negotiable. Small distribution defects create large performance penalties.
Pump Health
- Net Positive Suction Head (NPSH): Keep adequate submergence to prevent vortexing and cavitation. Cavitation erodes impellers and reduces flow.
- Hydraulic Curve Check: Compare measured flow/pressure (if gauges installed) to the pump curve; drift downward often signals impeller wear or blockage.
- Electrical Check: Measure current draw; elevated amps at normal flow can indicate mechanical binding or bearing wear.
Strainers and Orifices
- Size strainers to protect the smallest downstream orifice; too coarse a mesh lets fines clog distribution holes.
- Inspect orifices weekly during heavy dust loads; a single clogged orifice creates dry stripes on pads.
Distribution Pans and Headers
- Confirm dead-level pans. Even a 1–2° tilt over a long pan can starve one side of the media.
- Use equal-length branch tubing or balance orifices to ensure symmetric flow.
- If using spray nozzles, verify proper spray pattern (full cone vs hollow cone) per OEM design.
Bleed and Overflow
- Confirm bleed-off taps at low-velocity zones to remove the most concentrated water.
- Ensure overflow height is set to protect against unexpected float failure without flooding downstream ducting.
Commissioning Sequence
- Fill basin and purge lines.
- Start pump with fan off; watch top edge of media until full, even weeping occurs.
- Start fan and re-check wetting; high face velocity can reveal weak spots.
- Record pump differential (if instrumented) and media approach.
Verifying water quality and conductivity in evaporative cooling maintenance tips
Water chemistry is where many systems win or lose the long game. The target is to concentrate dissolved solids up to, but not beyond, the scaling or corrosion threshold for your materials and media, then hold it there with automatic bleed.
Key Parameters
- Conductivity (µS/cm) / TDS (ppm): Primary control variable for CoC.
- Hardness (Ca/Mg), Alkalinity, pH: Scale drivers; excessive hardness + high alkalinity encourages CaCO₃ precipitation.
- Silica: Can deposit as hard glassy scale at high CoC, especially at elevated temperatures.
- Chlorides: Watch for pitting risk even on stainless at high chloride levels; avoid over-chlorination.
- Langelier Saturation Index (LSI): Predicts scaling (+) or corrosive (−) tendency; aim for a mildly positive, near-neutral LSI when possible with stainless/cellulose systems.
Cycles of Concentration (CoC)
- CoC = (Conductivity in basin) ÷ (Conductivity of makeup).
- Typical targets range from 2–4 for moderate hardness; can be higher with excellent treatment or softening/RO pretreatment.
- Too low CoC wastes water; too high CoC accelerates scale on pads and inside headers.
Control Hardware
- Conductivity Controller: Calibrated against a standard solution; place the probe in a well-mixed zone away from the make-up inlet.
- Bleed-Off Valve: Modulating or timed solenoid controlling discharge to drain; verify it fails closed on power loss.
- Biocide/Scale Inhibitor Feed: Metered pumps tied to run hours or controller demand; verify injection quills and check valves.
Operating Practices
- Log makeup conductivity weekly (or more often during heat waves) since municipal chemistry can drift.
- Cross-check controller readings with a handheld meter; recalibrate when drift >2–3%.
- If hardness is very high (>300 ppm as CaCO₃), consider pretreatment (softener or partial RO). Note: Softeners reduce hardness but raise sodium; confirm impacts on pad life and drainage limits.
Troubleshooting Chemistry
- Foaming/Carryover: Often caused by surfactants or high TDS; reduce CoC and inspect for inadvertent chemical contamination from upstream processes.
- Rapid Scaling: Lower CoC, increase bleed, and verify inhibitor dosing; inspect for hot spots (e.g., sunbaked exterior faces) that flash scale.
- Corrosion/Red Water: Check pH and chlorides; avoid oxidizing biocide overdoses. Confirm stainless grade and passivation state.
Putting It All Together: A Model Maintenance Calendar
Pre-Season (March–May, depending on climate)
- Full cabinet/media inspection, basin cleaning, pump/valve service, sensor calibration, belt alignment/tension, documentation of baseline KPIs.
Peak Season (Daily/Weekly)
- Daily checks of wetting, basin level, fan amps, supply air approach to WB, and leaks.
- Weekly checks of conductivity vs handheld meter and quick orifice/strainer inspections.
- Monthly vibration spot-checks and belt retention if needed.
Post-Season (October–November)
- Deep clean/descale, drain and dry, remove/store media if recommended, open valves, corrosion protection steps, and lockout.
Pro Tips to Maximize Uptime and Efficiency
- Pre-Wet Logic: Program the controller to run the pump 2–3 minutes before fan start to saturate media and prevent dust ingestion into a dry pad.
- Economizer Integration: If tied to outside air systems, interlock to avoid running the pump when ambient WB is too high for effective cooling, thereby saving water.
- Spare Parts Strategy: Stock belts, a pump seal kit, orifice assortments, gaskets, a conductivity probe, and a bleed solenoid; cheap insurance against multi-day downtime.
- Instrumentation Pays: Even one differential pressure tap across the media and a supply DB sensor can help you quantify pad fouling and optimize changeout timing.
- Keep it Clean Around the Unit: Dust and organics near intakes become fouling inside; proactive housekeeping reduces chemical load and pad maintenance.
Troubleshooting Quick Reference
- Uneven pad wetting → Check distribution pan level, clogged orifices, pump intake strainer, or pad compression/gaps.
- High supply temperature (poor cooling) → Verify approach to WB; inspect pad fouling, pump flow, fan CFM vs design, and water temperature rise from recirculation.
- Excessive water use → Float hunting, bleed valve stuck open, or CoC set too low; also check leaks in headers or unions.
- Electrical trips on pump → Cavitation (low basin level), seized seal, or impeller fouling; check amperage against nameplate.
- Visible drift/mist → Over-saturation, missing drift eliminators, or too high face velocity; reduce pump flow or fan speed and restore eliminators.
Why Rigorous Maintenance Matters
Evaporative coolers operate in a tight thermodynamic window: they trade sensible heat for latent via adiabatic saturation. The closer your supply air gets to ambient wet-bulb, the more cooling you realize for each watt of fan power and each gallon of water consumed. Media cleanliness, uniform wetting, and controlled basin chemistry are the three pillars that determine how close you run to that limit, day after day, week after week.
By faithfully executing the seasonal, daily, and annual maintenance routines outlined here, and paying special attention to pads, water distribution/pump health, and water chemistry/conductivity, you’ll preserve approach temperature, keep fan power within spec, and minimize unplanned outages.
Contact Us Today
For organizations that can’t afford guesswork during peak cooling months, partnering with an experienced manufacturer is the fastest path to reliability. Premier Industries, Inc. has engineered and manufactured evaporative coolers in Phoenix, AZ, for over 30 years. Our products feature a 10-year warranty on stainless steel housings and high-efficiency rigid-type cooling media delivering up to 90% cooling efficiency. We support both engineering and design and can design and build equipment to meet virtually any evaporative cooling, filtration, or air-handling need.
If you’re looking for an efficient, reasonably priced, and innovative way to cool your home or commercial space, or you want expert guidance on implementing these maintenance practices, look no further than Premier Industries, Inc. Explore systems, request specifications, or consult with our engineering team. Let’s optimize your evaporative cooling performance and keep you comfortable when it matters most. Contact us!
Categorised in: Evaporative Coolers
This post was written by Mike Nicolini
Comments are closed here.